
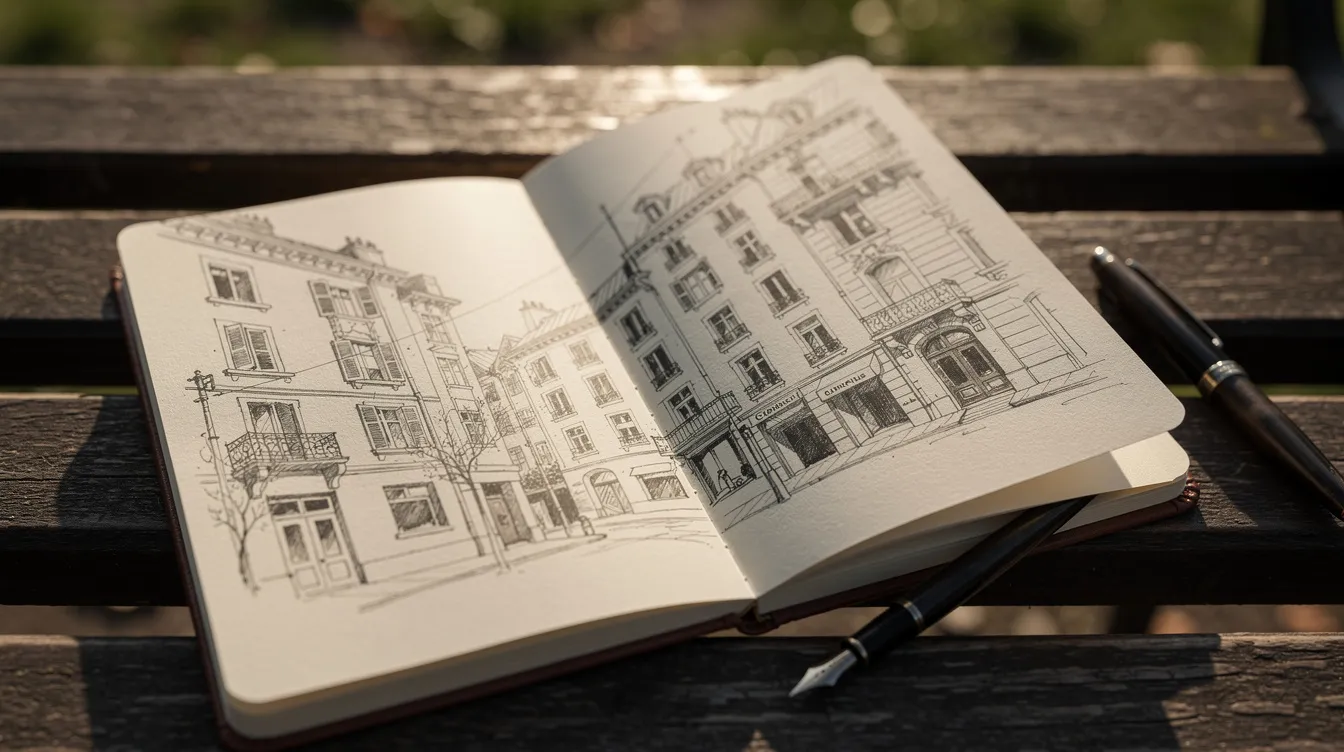
What is sketching in art and why does it matter?
Sketching is the quickest way I know to improve at drawing. I am Ruairi, a school caretaker in Cork who has been sketching on lunch breaks for four years, and this is everything I have learned about the practice, the tools, and the process of putting pen to paper in the real world.
What Sketching in Art Actually Is (And Why It Matters)
I started four years ago with a cheap fountain pen and a pocket sketchbook bought for a weekend trip to Galway. The first page was a crooked row of shopfronts on Quay Street, and it was bad, and I did not care. I kept going. Now I sketch most days on a bench outside the school, and that small habit has changed the way I see everything around me.
A sketch is a quick, exploratory type of drawing, usually done with simple tools, where the focus is on observation and ideas rather than polish. Wikipedia describes it as a “rapidly executed freehand drawing” that is not usually intended as a finished work. That definition matters because it tells you sketching is ordinary. It is not something that requires talent or training to begin. It is an established part of art history and the creative process, a foundation that many artists build on before committing to a final work. For a broader overview, see Wikipedia’s entry on sketches.
The difference between a sketch and a finished drawing is about purpose. A finished drawing is about the result. A sketch is about the process. I use sketches as studies for street scenes, Cork buildings, and people at the bus stop. They help me explore composition, test an idea, and figure out where the light falls before I pick up a brush or commit to ink.
Sketching teaches core fundamentals like perspective, three-dimensional form, and composition, but the real lesson is simpler: it teaches you to look. I thought I knew what a doorway looked like until I tried to draw one and realized I had never noticed whether the frame was wider at the top or the bottom. Sketching sharpens observation skills by training you to look at your subject rather than rely on the symbol your brain keeps on file.
It also provides a low-stakes environment for trying things. A sketch is allowed to be bad. That freedom makes it easier to identify and solve structural problems, like a roof angle that does not match the wall below it, without feeling that you have ruined hours of careful work.
And it fits real life. I have about twenty minutes between finishing my rounds and the bell, and a sketchbook in my jacket pocket turns that gap into something I look forward to. This article stays practical: small portable kits, quick sketches, basic shapes, and building hand eye coordination rather than art theory.
Sketching vs Drawing: What Makes a Sketch a Sketch
Drawing and sketching overlap. Both involve marks on paper, and both can use the same tools. But I treat them differently. My loose rule: a sketch takes minutes, a drawing gets more time on accuracy and detail, and a painting is built with colour and mass and is slower again. These are not strict categories; they bleed into each other, which is part of the fun.
Sketches are looser. They have restated lines, incomplete areas, lighter pressure, and they live on smaller paper with fewer tools. A rough drawing is a record of looking, not a performance. A finished drawing, by contrast, chases accuracy, clean edges, and often full shading. The final drawing often takes an hour or more.
A concrete example: I once did a three-minute pen sketch of Cork’s Patrick Street, standing at the crosswalk with the sketchbook on my forearm. It was messy, alive, and caught the lean of the buildings in a way I liked. That evening I tried a slower ink-and-watercolor drawing of the same corner at home, using a photo for reference. It was tidier, but stiffer. I mix the two methods all the time. Often I do an ink sketch on location, then add a quick wash over the top in about fifteen minutes, which lands somewhere between a line drawing and a painting.
Sketches allow you to rapidly explore compositions before committing to a final medium, so they are not “lesser” work. A lively sketch can feel more alive than a stiff finished piece. Sketching is a discipline in its own right, not just preparation for something bigger.
A Very Short History of Sketching in Art
Sketching dates back to at least 25,000 BCE, when humans scratched images of animals and movement onto cave walls. Those marks were rough, immediate, and probably practical rather than decorative. The same concept, recording what you see in quick strokes, has persisted for thousands of years.
Ancient Chinese brush drawing dates to 300 BCE, making it one of the earliest formalized traditions of mark-making with ink. In Europe, the Lindisfarne Gospels, created in the 8th century, contain some of the oldest surviving pen and ink drawing. Graphite was discovered in Borrowdale, England, in 1564, and the French artist Nicolas Conté invented the modern pencil in 1795, giving artists a portable, consistent drawing tool that is still the standard. Pastels became popular in the 16th and 17th centuries, adding another medium for quick studies and illustration.
Renaissance artists like Leonardo da Vinci and Michelangelo filled sketchbooks with pen, chalk, and charcoal studies of anatomy, architecture, and inventions. Leonardo produced around 6,500 surviving leaves of texts and drawings, and many of these “rough” pages now hang in major museums as masterpieces of fine art, even though they were never meant as finished pieces.
By the 19th century, artists were sketching outdoors to capture light and city life, a tradition that connects directly to modern urban sketching in places like Cork or Galway. Sketching has always been a working tool first, artwork second, which is why it suits hobbyists and busy people today. I find it reassuring that something so simple has such a long history.
Tools for Sketching: Keeping It Simple and Portable
A sketchbook and pencil are essential for sketching. That is the whole list, if you want it to be. A small kit is part of why I keep doing this, and a pencil and any notebook is a perfectly good start, so do not wait to buy something nicer.
I recommend a small A5 or A6 sketchbook that fits in a bag or coat pocket. Mine rides in my work jacket every day. For a park bench or a bus seat, a smaller sketchbook is easier to hold on your knee.
Here is a practical checklist of tools:
-
HB pencil: medium hardness, good for light construction lines
-
2B or 4B pencil: softer, darker strokes for sketching and shading
-
6B pencil: ideal for shading and expressive sketches where you want rich, dark marks
-
Black fineliner or fountain pen: for confident ink work
-
White vinyl eraser: clean removal, minimal debris
-
Kneaded eraser: soft and mouldable, useful for lifting graphite to create soft highlights in sketches
-
Blending stumps: for smoothing charcoal or soft pencil if you use different materials
Graphite pencils range from H (hard, light, precise lines) to B (soft, dark). Using varied pencil grades can make a real difference; an H for faint scaffolding and a 4B for shadow gives a sketch depth without fuss. Technical pens provide precise lines and come in various sizes, so they are worth trying if you want consistent line work.
If you use a fountain pen like mine, the ink matters. You want waterproof ink that will not bleed or feather on your paper, and that will hold up if you add water later. I test ink on the last page of a new sketchbook before committing to it. If you are choosing one, my notes on the best ink for fountain pens cover what I have tried. For a deeper look at the ink itself, see my notes on choosing ink for sketching.
Optional extras I carry: a water brush, a tiny watercolor palette, a bulldog clip for windy days, and a small cloth. A single pen taught me more than a drawer of markers, so choose a drawing tool you will actually carry every day, not a big kit that stays at home.
Warming Up: Building Hand Eye Coordination
I still warm up on scrap paper or the back of a sketchbook page, even after years of sketching. Good sketching begins with confident and controlled lines, and a two-minute warm-up makes the difference between stiff first marks and fluid ones.
Hand eye coordination, in practical terms, means training your hand to follow what your eyes see, rather than what your brain thinks “a chair” or “a face” looks like. Practice hand eye coordination with warm-up line exercises: rows of straight lines, arcs, circles, ellipses, and loose shapes. Draw them slowly, then quickly, with different pressure. Use the whole arm from the shoulder for long, smooth strokes, which helps when you need to outline a building or a tree canopy in one sweep.
Blind contour drawing exercises improve hand eye coordination and perception. The exercise is simple: pick an object, look at it, and draw its contour without looking at the paper. The result will be strange. That is the point. It forces your eyes to lead and your hand to follow, which is the core skill behind every sketch.
Treat warm-ups as playful and messy, not precious art. They build the muscle memory and looseness that show up later in quick public sketches where there is no time to fiddle with small corrections.
Seeing in Basic Shapes Instead of “Things”
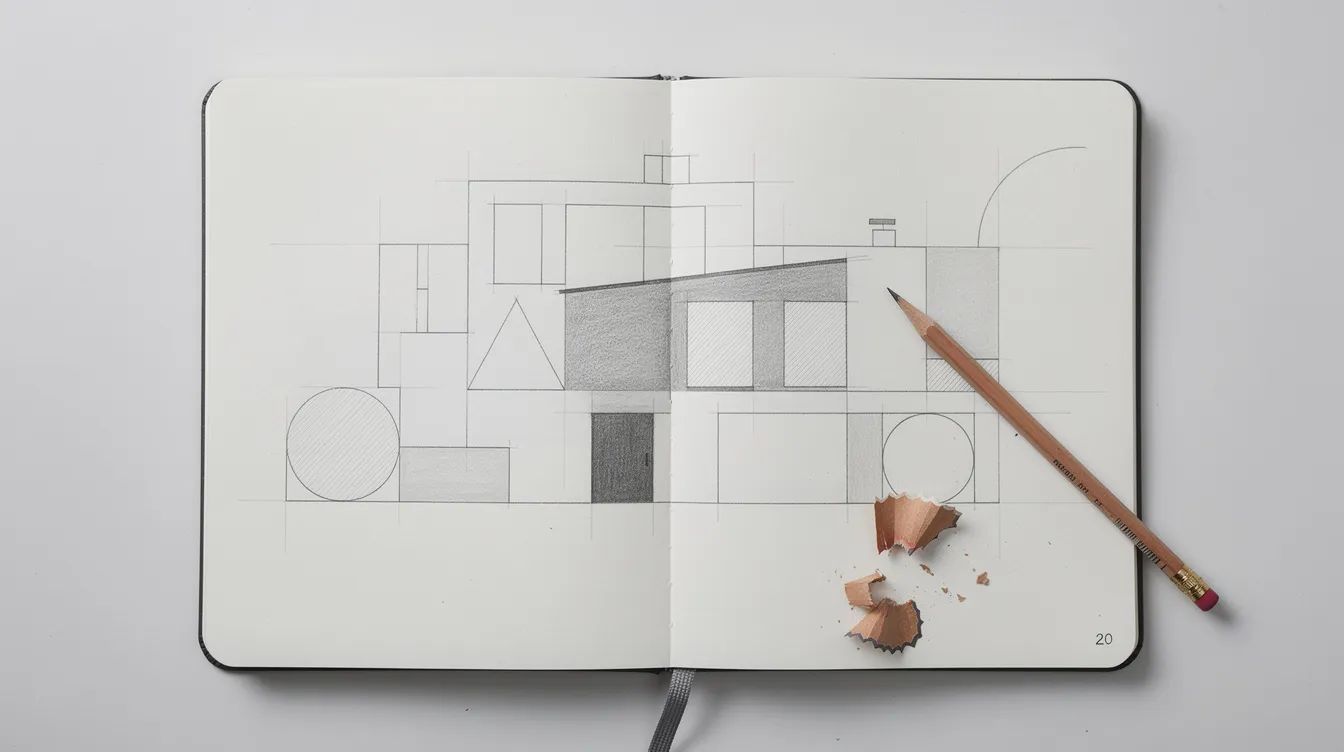
Breaking complex subjects into basic shapes is the fastest way I know for beginners to get proportions under control. Sketching involves breaking down complex objects into simpler geometric shapes: mugs as cylinders, windows as rectangles, roofs as triangles, heads as ovals. Basic shapes include circles, rectangles, and triangles, and simplifying complex forms this way makes them easier to draw before you add any detail.
Start by picking one small thing, like a gate, a lamp post, or a parked van. If I try to draw the whole street I give up, so I choose a piece of it and look for the big block first: a tall rectangle, a leaning triangle, or a long low box. Use basic shapes as a foundation for drawing objects, and build outward from there.
A concrete example: I sketch a Georgian terrace in Cork by first placing a large rectangle for the facade, then smaller rectangles for windows, a rectangle for the door, and a triangle for the roof. A circle for a window arch, a few more lines for chimneys. The building appears in ten seconds, and everything else is refinement.
Use light lines for initial sketches of these shapes so they are easy to adjust. The angle and size of shapes relative to each other matter more than tiny details at this stage. Refine basic shapes into more defined structures later, once the proportions feel right. A two dimensional drawing of flat shapes on paper starts to look three-dimensional as soon as you add even a rough sense of depth.
Practice this at home: fill a page with household items turned into simple shape diagrams before adding any surface detail. A kettle is a circle on a rectangle. A bookshelf is stacked rectangles. You can break down objects into basic shapes in various ways, and the more you do it, the faster it becomes on the street.
Gestures and Quick Sketches: Capturing Energy Fast
Quick sketches suit busy people. Most of my sketches take ten to twenty minutes, and a shorter time limit often gives livelier results. I did a three-minute sketch at a bus stop last week: a woman with a bag over one shoulder, leaning slightly left. The sketch is five lines and a scribble of hair, and it captures the tilt of her posture better than anything I could have laboured over.
Gesture sketching means fast, fluid drawing that focuses on movement, tilt, and overall posture rather than details. Gestural drawings capture the essence of the human body in motion, and the time pressure forces you to be loose. Create quick sketches to improve fluidity and hand eye coordination; the speed strips away the urge to fuss.
Try timed exercises: ten 30-second poses from people walking past, or ten one-minute sketches of parked bikes. Let curved lines overlap. Accept wobbles. Frequent sketching builds muscle memory and improves hand eye coordination, and a page of ten rough attempts teaches you more than one polished piece.
Sketch people from behind or in profile on trains and buses to reduce self-consciousness. Focusing on gesture rather than likeness keeps the pressure off and the strokes honest. The subject does not need to know.
Building Up from Light Lines to Confident Contours
The move from rough construction to clearer forms is the core rhythm of my sketching process. I start light, commit selectively, and try to stop before I overwork the page.
The approach works in stages. First, faint guidelines: shapes, proportions, angles. Then I decide which contour line to commit to, darkening it, and leave the rest faint or let it sit as part of the sketch’s energy. Refine sketches by checking angles and edges against the subject, holding the pen up to compare a roofline with the top of a window, or the width of a door with its height. Artists can solve problems related to proportions and lighting through this kind of patient comparison.
Pause often to look at the whole page rather than the detail you are working on. Draw what is actually there, not the symbol in your head. With practice, many artists skip the underdrawing and go straight in with pen. I often commit and accept the wobble, adding more lines only where they help. Refine basic shapes into defined structures as confidence grows, but there is no rush.
My hardest habit to learn: stop earlier than you want to. Overworking a sketch kills its freshness. When I notice I am fiddling, the cap goes back on the pen. The final drawing is rarely the one with the most marks; it is the one where I stopped at the right time.
Adding Light, Shadow, and Texture with Hatching
Shading in sketches should support the drawing, not smother it. A little texture often goes a long way.
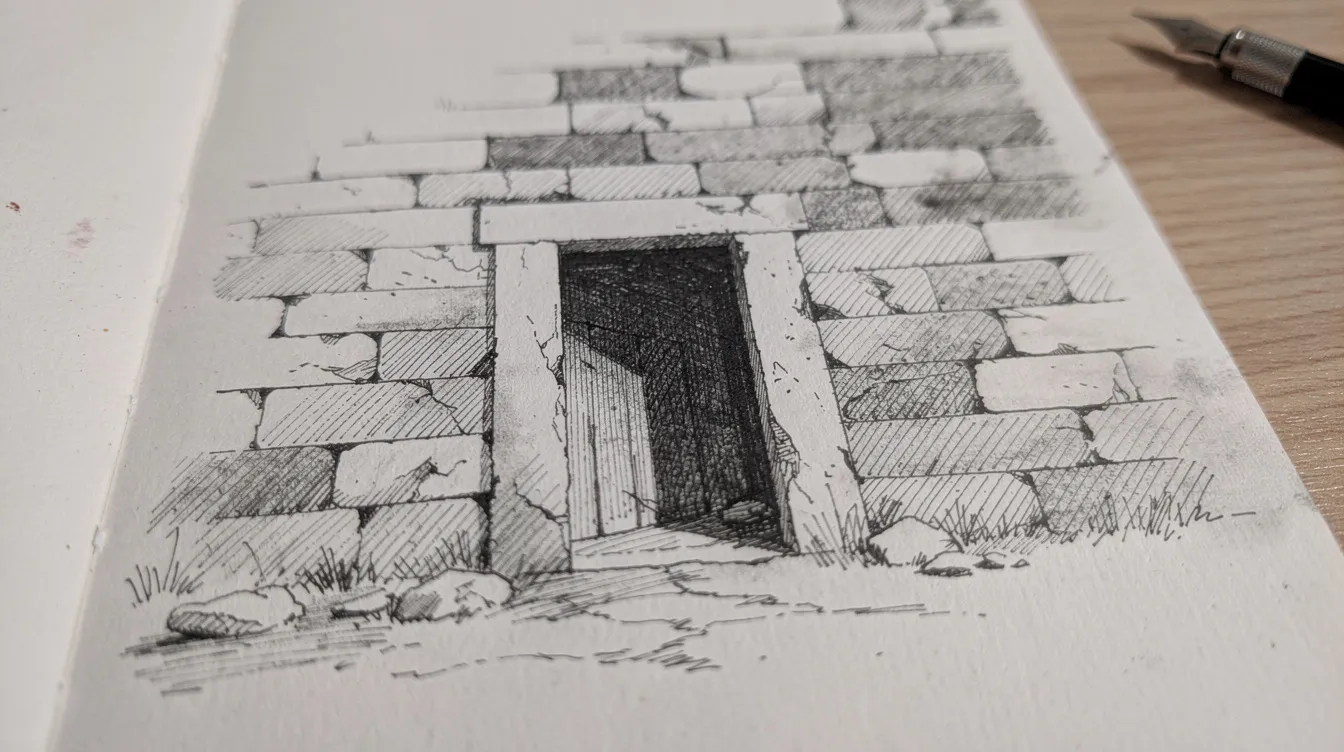
Hatching means sets of parallel lines to suggest a darker tone. Closer lines mean darker areas, and I use this under roof eaves, beneath benches, and in doorways. Cross hatching layers lines at an angle over the first set to deepen shadows; I use these two methods on stone walls, folded coats, and tree trunks. Shading practices help give depth and three-dimensionality to sketches, turning flat shapes into solid forms.
Line direction matters. Curved lines following the surface of a cylindrical lamppost suggest its roundness. Straight hatching across a flat door reads as a flat plane. A 6B pencil is useful here for filling darker areas quickly with soft, rich strokes.
I never draw every brick. Suggest texture in one small patch, and the eye fills in the rest. A few lines of brick pattern on the corner of a wall tells the viewer the whole wall is brick.
Encourage yourself with small shading test patches in the corner of the sketchbook. Squint at the subject to see big value shapes, then hatch only the key shadows. That discipline keeps a sketch breathing instead of suffocating it under ink.
Urban Sketching: Applying These Ideas on the Street
I started sketching on a bench in Galway and carried on in Cork, where I sit outside the school most days with my jacket pocket kit. Everything in this article connects when you face a real street scene.
A step-by-step approach for a street sketch:
-
Place a horizon line at eye level
-
Block in the large shapes of buildings and pavement
-
Add main verticals: lampposts, window edges, door frames
-
Insert trees, people, and moving elements last
Drawing from life improves artistic skills more than drawing from photos, because you see depth, light shifts, and scale that a flat image cannot give you. Urban Sketchers, the worldwide community of people who sketch on location, are a friendly crowd and a good source of inspiration if you want company or ideas on where to sketch.
Practical tips for the street: sit slightly to the side, keep your tools minimal, and accept that people will move or leave before you finish their outline. When the Irish weather turns, keep sketches small with one clear subject. A pen and ink sketch of a single lamppost in the rain can be more satisfying than a sprawling composition attempted in sunshine.
Some of my favourite pages are of bins, drainpipes, and the back of the school hall. I always add a note of the date, place, and weather, which makes the page worth more months later. Treat each outing as a stack of practice sketches, not a quest for one perfect drawing.

Using a Little Watercolor with Ink Sketches
Watercolor is optional, but popular with many sketchers including me. It adds a layer of personal expression to a page that ink alone cannot quite reach, and it does not need to be complicated.
Ink and watercolor pair well for quick sketches because the ink provides structure and the washes suggest shadow and colour without heavy detail. The process is simple: finish your ink sketch, let it dry, then lay in two or three broad washes for sky, shadow, and one colour accent like a red door or a green tree. This works as a natural next step from other media like pure pencil or charcoal sketches.
Keep the kit small: a few pans, a water brush, decent paper (200 gsm if possible), and maybe just a primary triad plus a neutral like warm grey or sepia. Test colours on a corner of the page before committing to a large area. Different methods of applying washes, wet on dry versus wet on wet, give different results, and experimenting is half the point. My watercolor supplies list covers the rest of the kit. If you are starting from zero and want a fuller rundown of paints, brushes and paper, see what supplies you need for watercolor painting.
The line work should still read clearly even if the colour is loose, uneven, or slightly outside the lines. If you lose the drawing under a wash, the painting loses its skeleton.
Regular Practice: Short Sessions, Big Gains
Drawing on my lunch break built my sketching skills more reliably than rare, long weekend sessions. Engaging in daily sketching builds discipline and can lead to noticeable improvements within weeks, not months.
Attach sketching to something you already do. My anchor is the bench outside the school: lunch break, bench, one sketch. I set a loose goal of one small page on working days and give myself permission to skip when it rains sideways. Some weeks I did three pages and some none, and that was fine. Regular sketching develops artistic confidence by allowing practice without judgment, and sketchbooks capture fleeting moments and observations from daily life that you will not remember otherwise.
Simple challenges help maintain focus: a week of only basic shapes, a week of only cross hatching, or a week of only people from behind. Sketching encourages experimentation with different techniques and styles, and these weekly limits keep things fresh.
Track improvement by sketching the same place across the seasons. Seeing the same tree bare, then leafy, then bare again taught me more about light and structure than any single illustration ever could. After making many drawings of the same subject, you notice the changes in yourself as much as the changes in the scene.
Keep every sketch, even the awkward ones, in the same sketchbook. I tore out bad pages early on and regretted it. Most of my progress came from the dozens of ugly pages, not the few good ones. Embrace mistakes as part of the learning process in sketching; they are the pages that teach you the most.
Common Beginner Fears and How Sketching Helps
I spent my first month sketching only in my kitchen because I was afraid someone would see my sketchbook and think it was rubbish. Common worries: people watching, wobbly lines, not knowing where to start with a complicated object, or “ruining” a clean page. Whatever your skill level, these fears are normal.
Sketching’s casual, incomplete nature is an advantage. It provides a safe space for creative risk-taking without the pressure of perfection. A sketch on cheap paper is not precious, so you can try a weird angle, an unfamiliar subject, or a technique you have never used before, and nothing is lost if it does not work. Tell readers not to wait until they feel ready. I wasted months thinking I needed to learn more first, and the only thing that helped was filling pages.
On a busy Cork street, nobody really cared what I was doing. People rarely mind. Someone usually says hello. Now and then a pupil’s parent asks what I am drawing, which makes a good conversation starter. The awkwardness fades after a handful of sessions.
Start in quieter spots if the thought of a crowd is too much: parks, a bus seat facing away from others, a quiet corner of an office courtyard. Every artist you admire went through the same wobbly stages, and the only way through is to keep sketching.
Next Steps: Growing Your Sketching Practice
The core process is short enough to remember: warm up, see in basic shapes, sketch quickly, then refine and add selective shading or colour. That loop repeats every time you open your sketchbook.
Try a simple personal project: sketch a different corner of your own town each week for a month. Look at your own world as a sketchbook, from bus interiors to office courtyards, rather than hunting for “special” subjects. Sketching serves as the foundation of the creative process, and every surface you look at is a potential page.
Bench Sketcher is just my personal record as a hobbyist caretaker in Cork. I sell nothing. I am not a teacher. I am someone who picked up a cheap pen and found it changed the way I look at my own street. Treat your sketchbook as an honest diary rather than a portfolio.
Choose one subject today. Grab the nearest pen or pencil. Set a ten-minute timer. Make three quick sketches without judging the result. That is all it takes to start sketching.
FAQ
Is sketching the same as drawing? Not quite. Sketching is a quick, loose, exploratory type of drawing. A drawing can also be a slow, detailed, finished piece. Both fall under drawing and sketching as broad categories, but they differ in speed, intent, and level of refinement.
Do I need to be good at drawing to start sketching? No. Sketching is how you get better at drawing skills in general. Aim to look carefully and fill pages, not to produce something polished. Many artists started with wobbly lines and improved by doing, not by waiting.
What do I need to start sketching? A pen or pencil and a small notebook are enough. I use a fountain pen and a pocket sketchbook. Colour, charcoal, and other tools can come later.
How long should a sketch take? Anywhere from two minutes to half an hour, with most of mine around ten to twenty minutes. There is no rule. Shorter time limits often produce livelier results.
Should I keep my bad sketches? Yes. They record your progress. Flicking back through them after a few months shows the change, and those pages are often where you learned the most.